Products
How to create and organise categories in your online store
How to create categories for your online store: add names and an image, set the order, show them in your menu and add products.
- Where
- Categories in the menu
- You need
- A name, ideally an image
- Menu
- Show a category in the header or footer
- Who can use it
- Every store
Categories help shoppers find what they want fast. This guide shows how to create categories for your online store, put them in the order you like, show them in your store menu and add products to them.
What to prepare first
- The category names you want, for example Clothing, Shoes and Accessories, in each language your store uses.
- One clear image for each category.
- The order you want them to appear in, from the most important to the least.
How to create categories
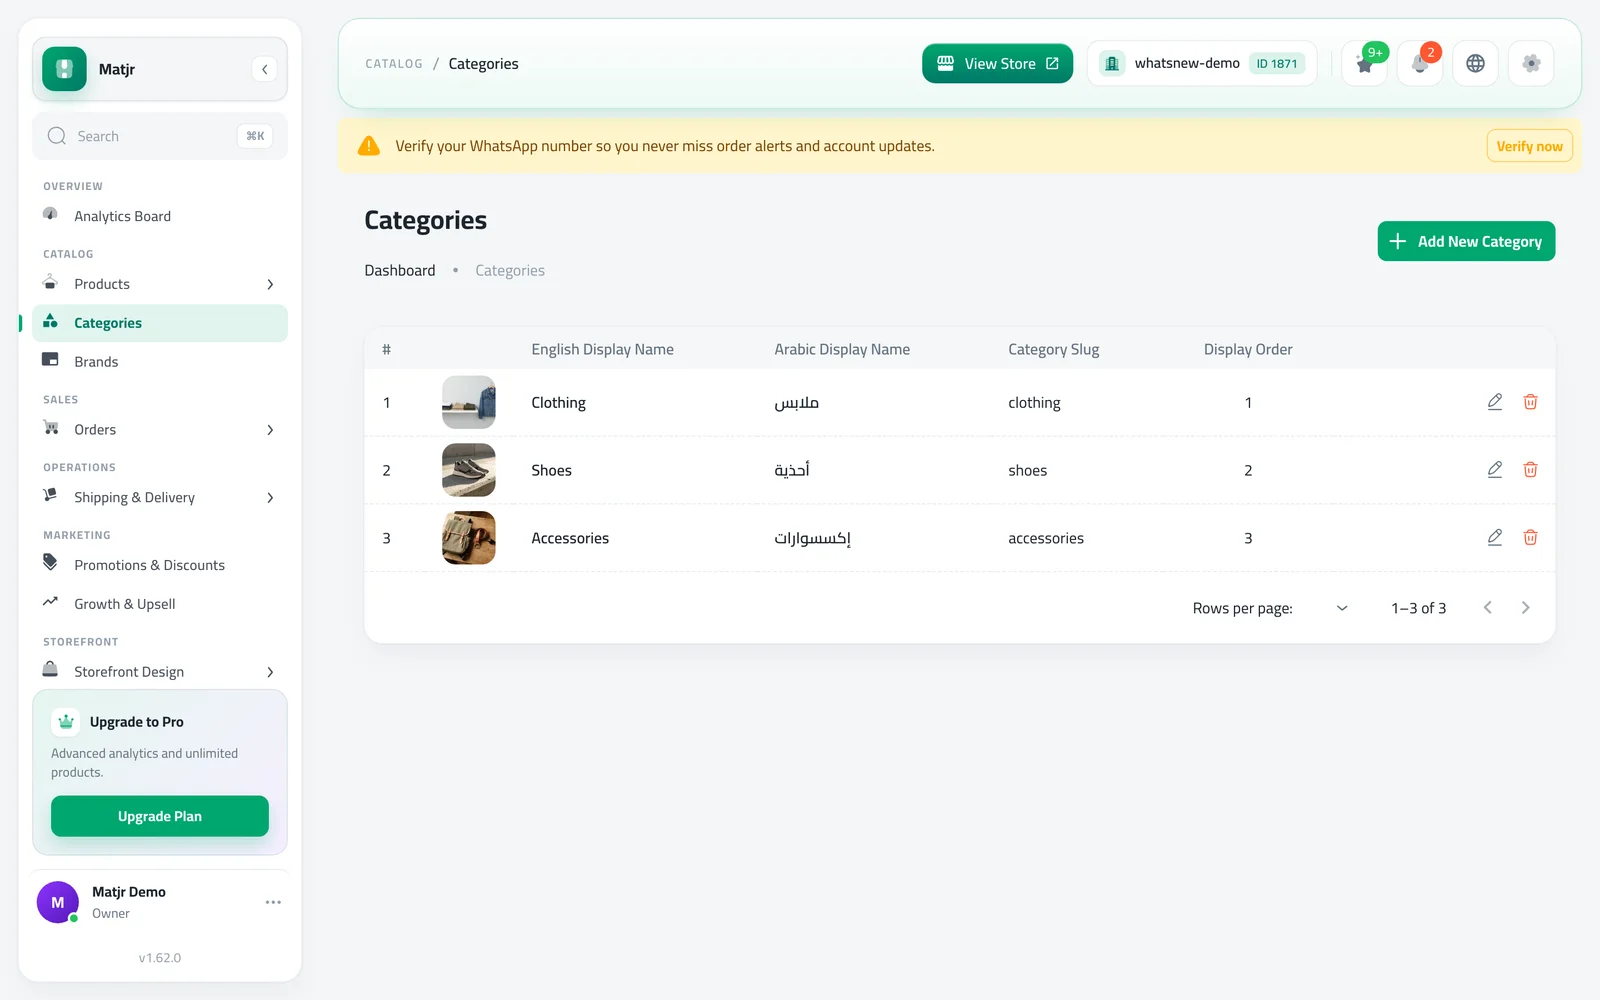
Open Categories from the menu. You see all your categories with their image, names, link name and Display Order. Click Add New Category.
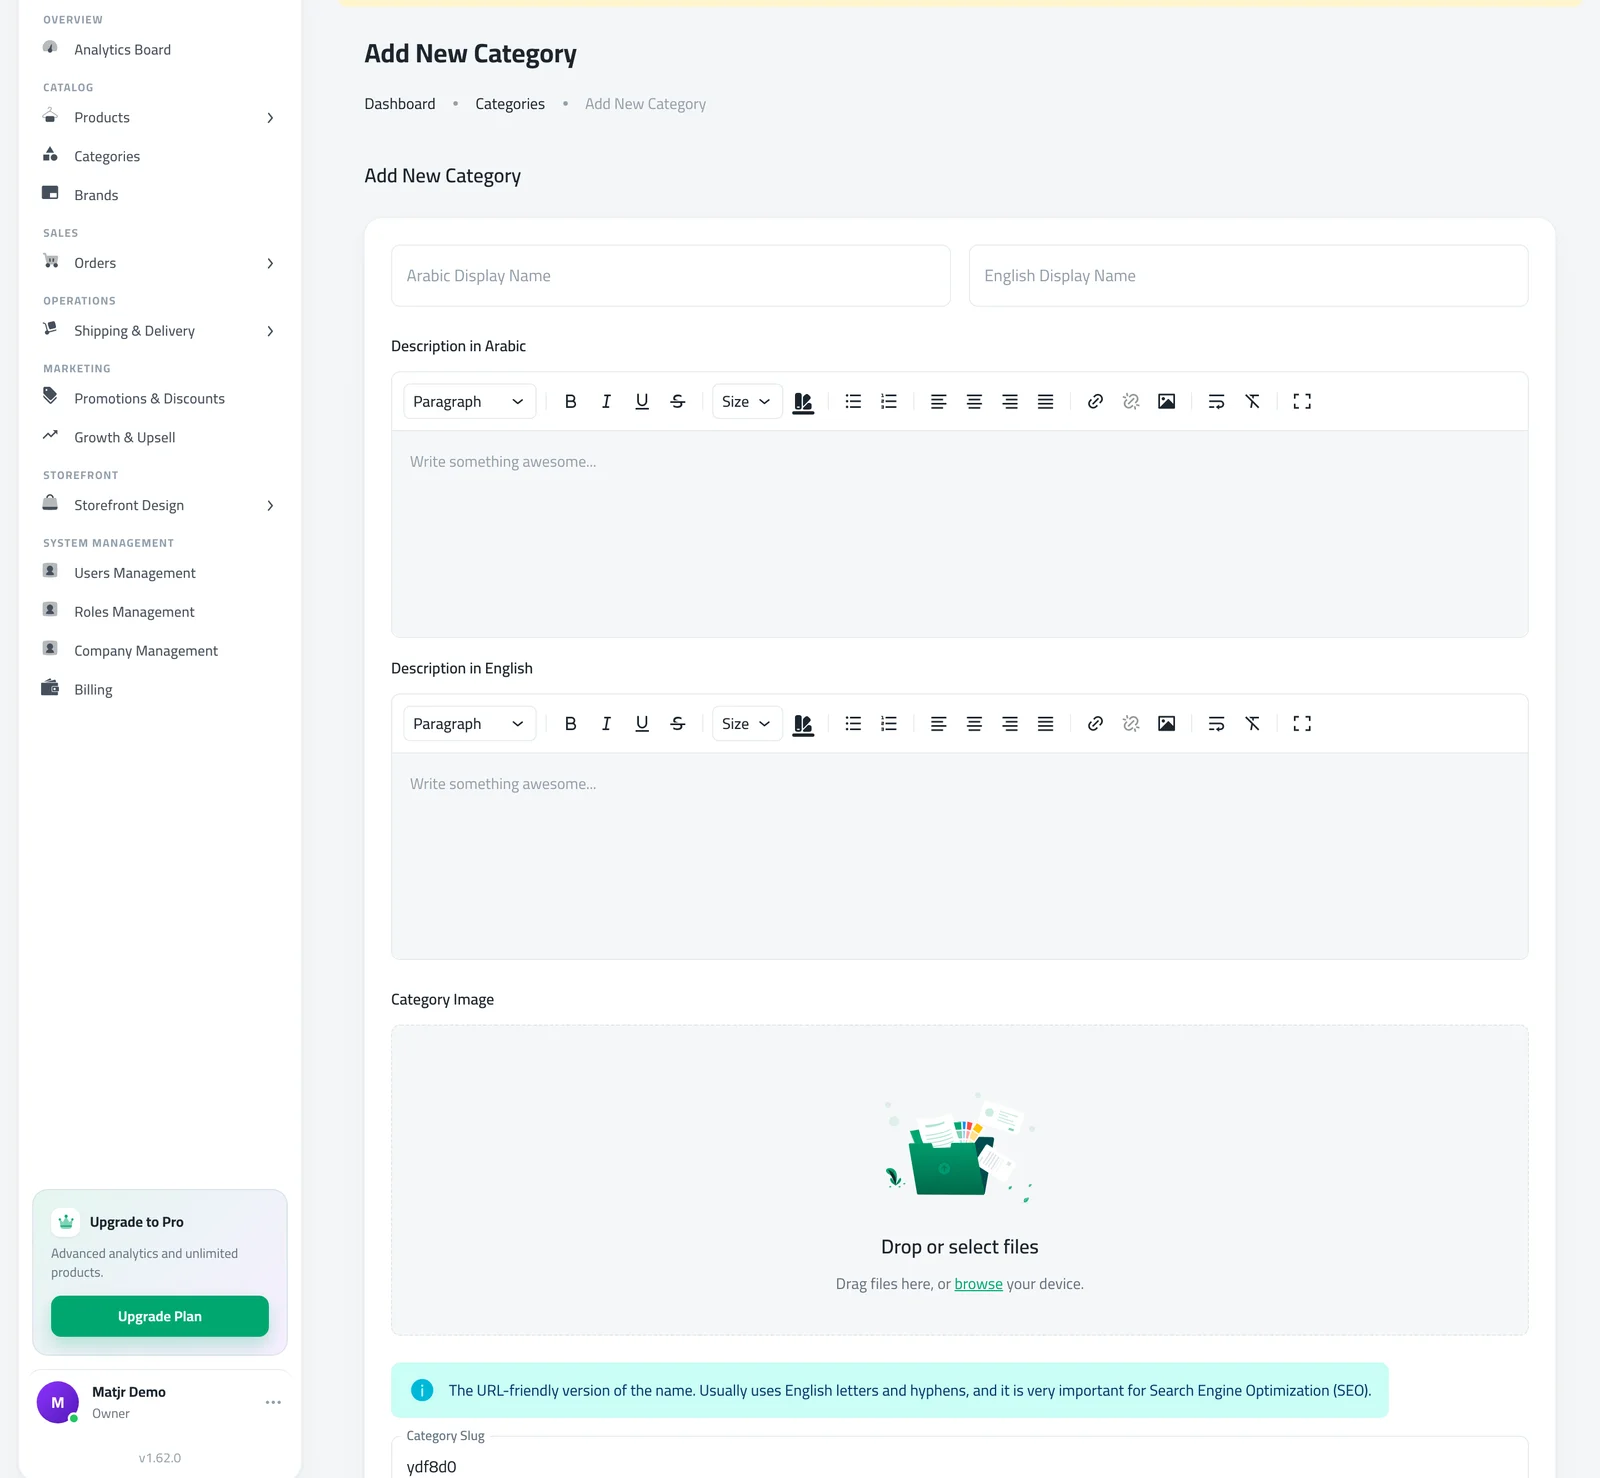
Fill the Arabic Display Name and the English Display Name. Enter a name in at least one language. Add a description if you want one, then drop a picture into Category Image. A category has one image, and dropping a new one replaces the old one.
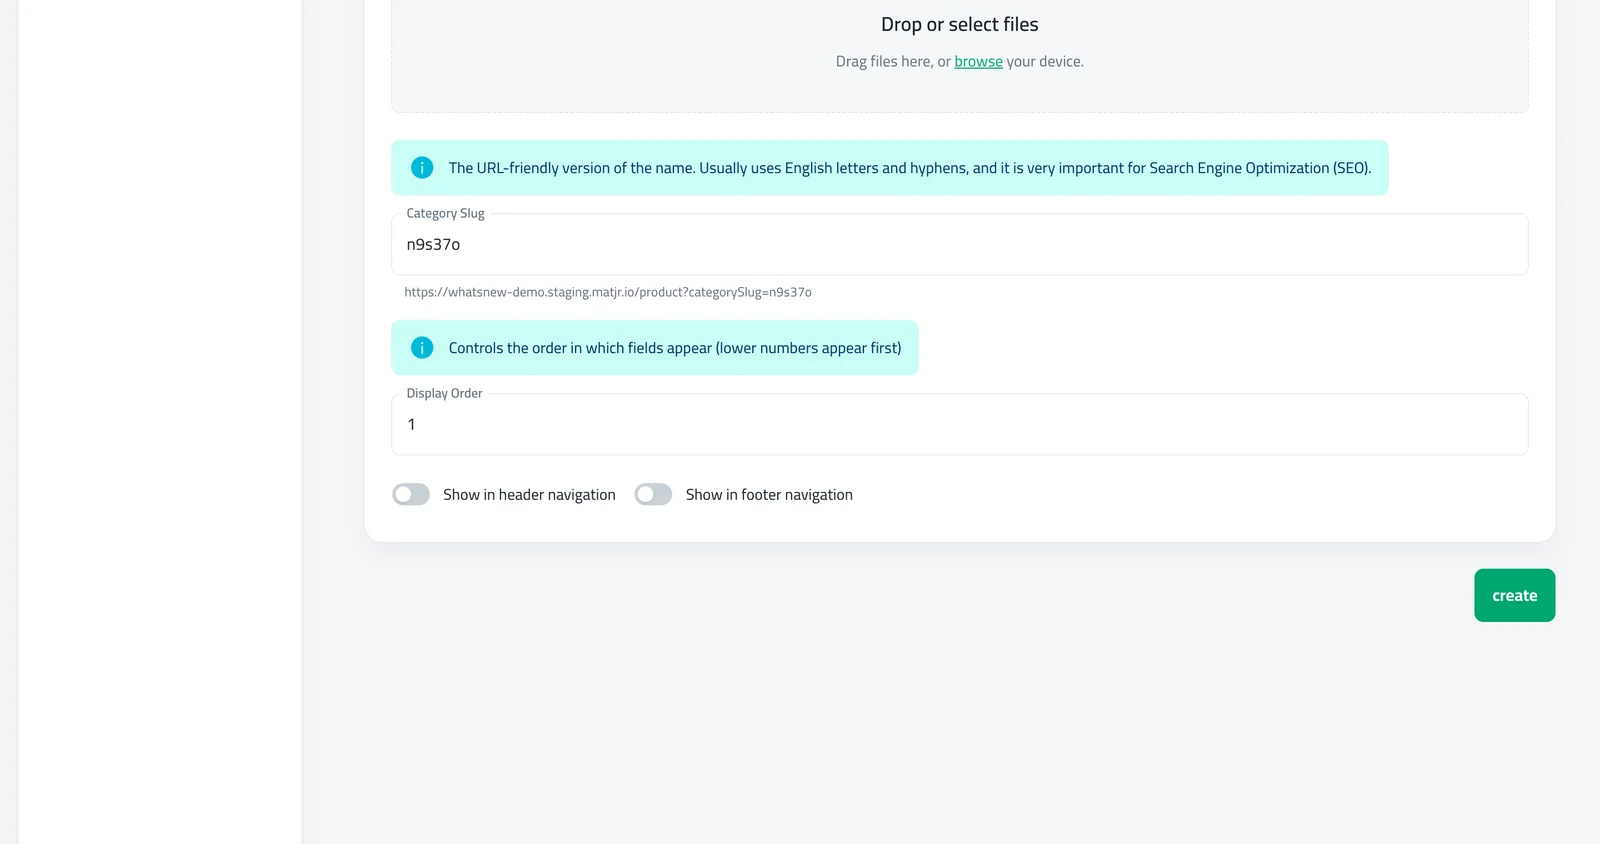
Check the Category Slug. This is the last part of the category's web address, and it is filled for you from the English name. You can change it, using letters, numbers and hyphens only. Set the Display Order: categories with lower numbers come first. Switch on Show in header navigation or Show in footer navigation to add the category to your store menu, then click Create.
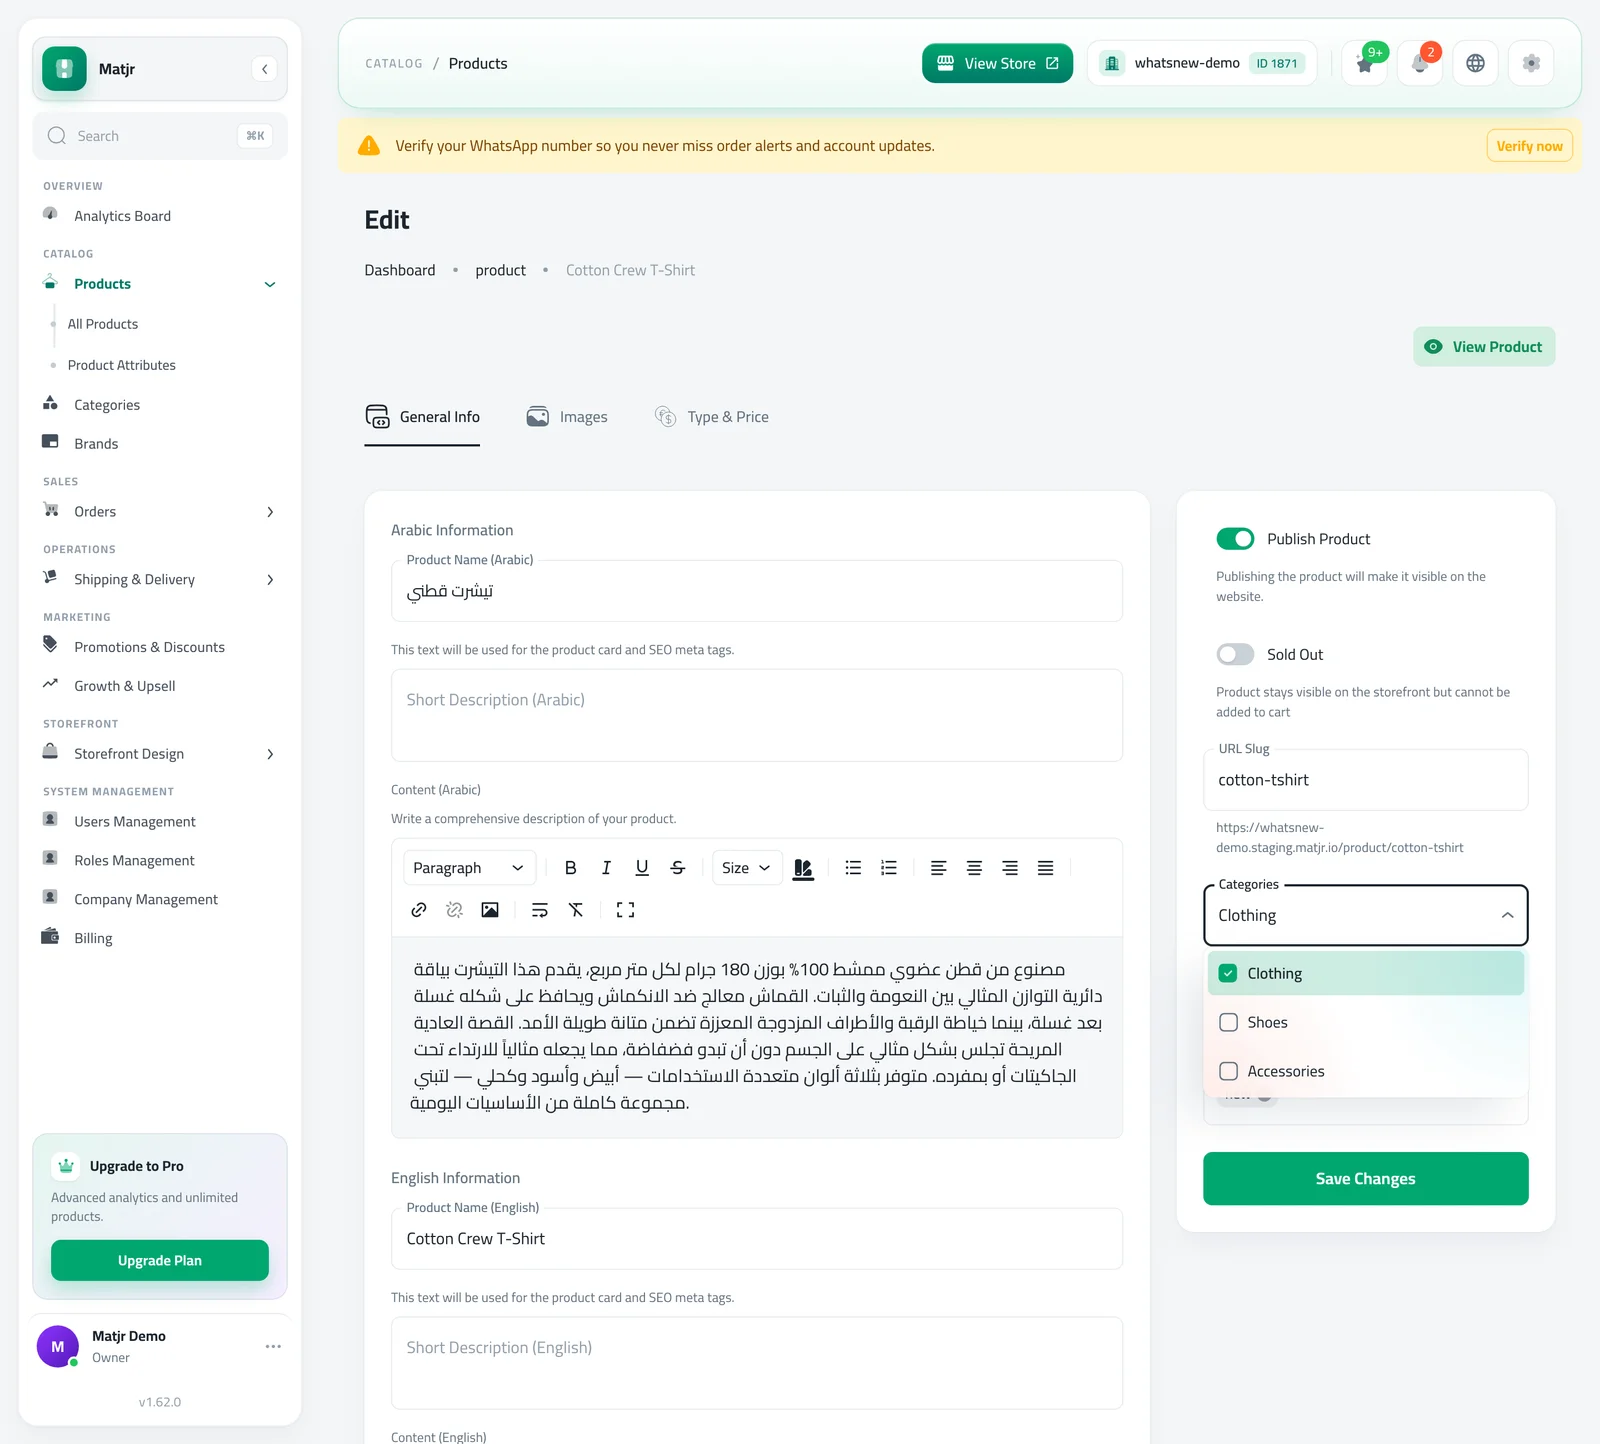
Now add products to the category. Open a product, stay on the General Info tab and click Categories. Tick one or more categories and click Save Changes. A product can belong to more than one category.
How to organise your categories
Good categories are short and clear. Use names your customers would say out loud, and avoid names like "Other" that tell them nothing. Keep the list small, since a few clear categories are easier to browse than twenty small ones.
Use Display Order to decide what comes first. Put your best sellers or your newest collection at number 1, and leave gaps such as 10, 20, 30 so you can add a category later without changing the others. To change a category, click the pencil icon on its row in the list, change what you need and click Save.
What to do next
With your categories ready, check that every product sits in the right one, then look at your store as a customer. Walk from the home page to a category and then to a product, and ask yourself if you would know where to click. If the answer is no, rename the category or change its order. Small changes here make a big difference to how easily people find what they want.
Plan your categories before you build them
Think about how a shopper walks through a physical shop. They look for a section first, then for the item. Your categories are those sections. A clothing store can start with Men, Women and Kids. A store that sells one kind of product can group by use, such as Home, Office and Travel.
Write your list on paper first. Put each product in the category where a customer would look for it first, and add it to a second category only when it truly fits both. Products that appear in too many categories make every category feel the same.
After you create a category
Open your store and check the menu on a computer and on a phone. Click each category and make sure the products you expect are there. If a category looks empty, go back to the products and tick it. Revisit your categories every few months, and remove or rename the ones that no longer match what you sell.
Common mistakes
- Creating a category and forgetting to add products. An empty category shows shoppers nothing, so add products right after you create it.
- Changing the link name of a category that customers already use. Old links to it may stop working.
- Showing every category in the header. A long menu is hard to read on a phone, so show only the main ones.
Good to know
- The Arabic and English boxes appear only for the languages your store has turned on.
- If a button is greyed out with the message "Subscribe or charge wallet to unlock this feature.", your plan needs to be active first.
- You can add, rename and reorder every link in your menu in the builder: how to edit your online store menu links.
- Every category has its own page in your store. See how to design your products page to choose how it looks.
- Need to add the products first? Read how to add a product to your online store.
Frequently asked questions
How many categories can I create?
The dashboard does not set a number for you. Keep the list short, since a few clear categories are easier for shoppers to browse.
Can one product be in two categories?
Yes. Open the product, tick every category it belongs to under Categories and save.
How do I change the order of my categories?
Change the Display Order number on each category. Lower numbers come first.
How do I show a category in my store menu?
Switch on Show in header navigation or Show in footer navigation when you create or edit the category.
Try it on your own store
Start your free trial. No credit card required.