Products
How to add a product to your online store
How to add a product to your online store: name it, set the price, add photos and sizes, set your stock and publish it.
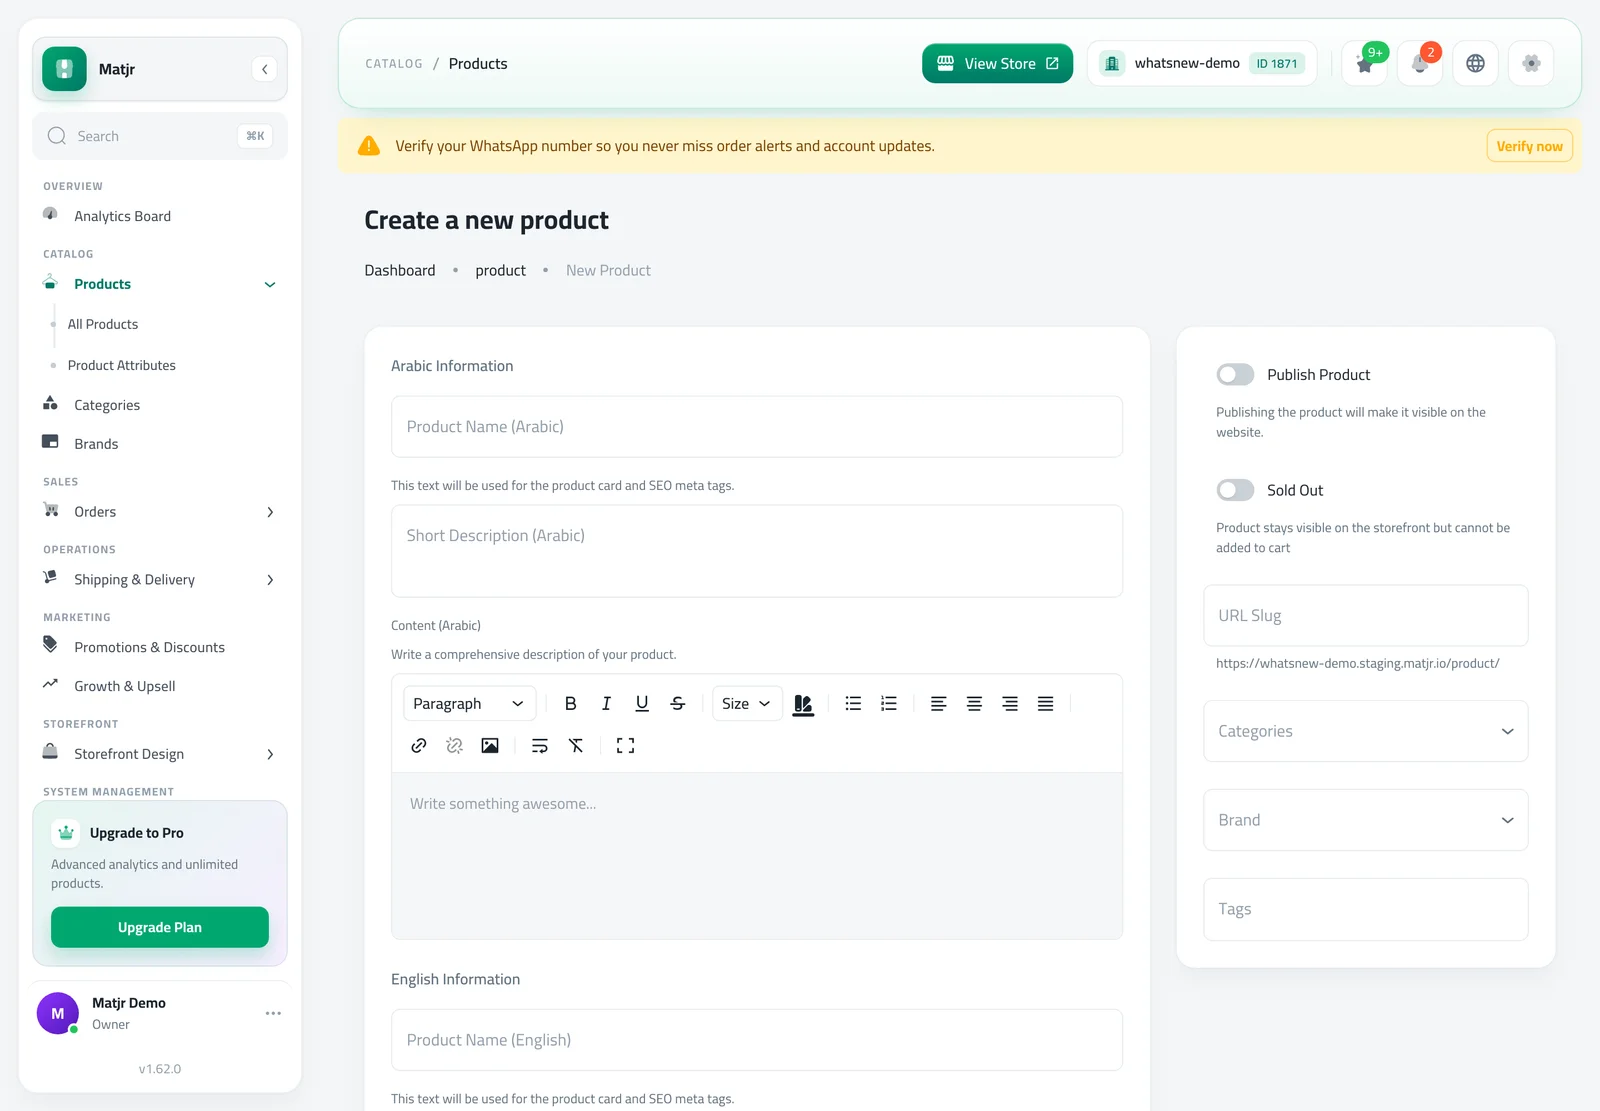
- Where
- Products, then Create a new product
- You need
- Name, price and at least one photo
- Photos
- Several per product, up to 15 MB each
- Who can use it
- Every store, in Arabic and English
Your online store sells only what you add to it. This guide shows you how to add a product to your online store: name it, set the price, add photos, offer sizes or colours, set your stock and publish it so shoppers can buy it.
What to prepare first
- A clear photo of the product. You can add several, each up to 15 MB.
- The product name and a short description in the languages your store uses.
- The price, and the sale price if the product is on offer.
- How many pieces you have in stock.
- The sizes or colours, if the product comes in more than one.
How to add a product
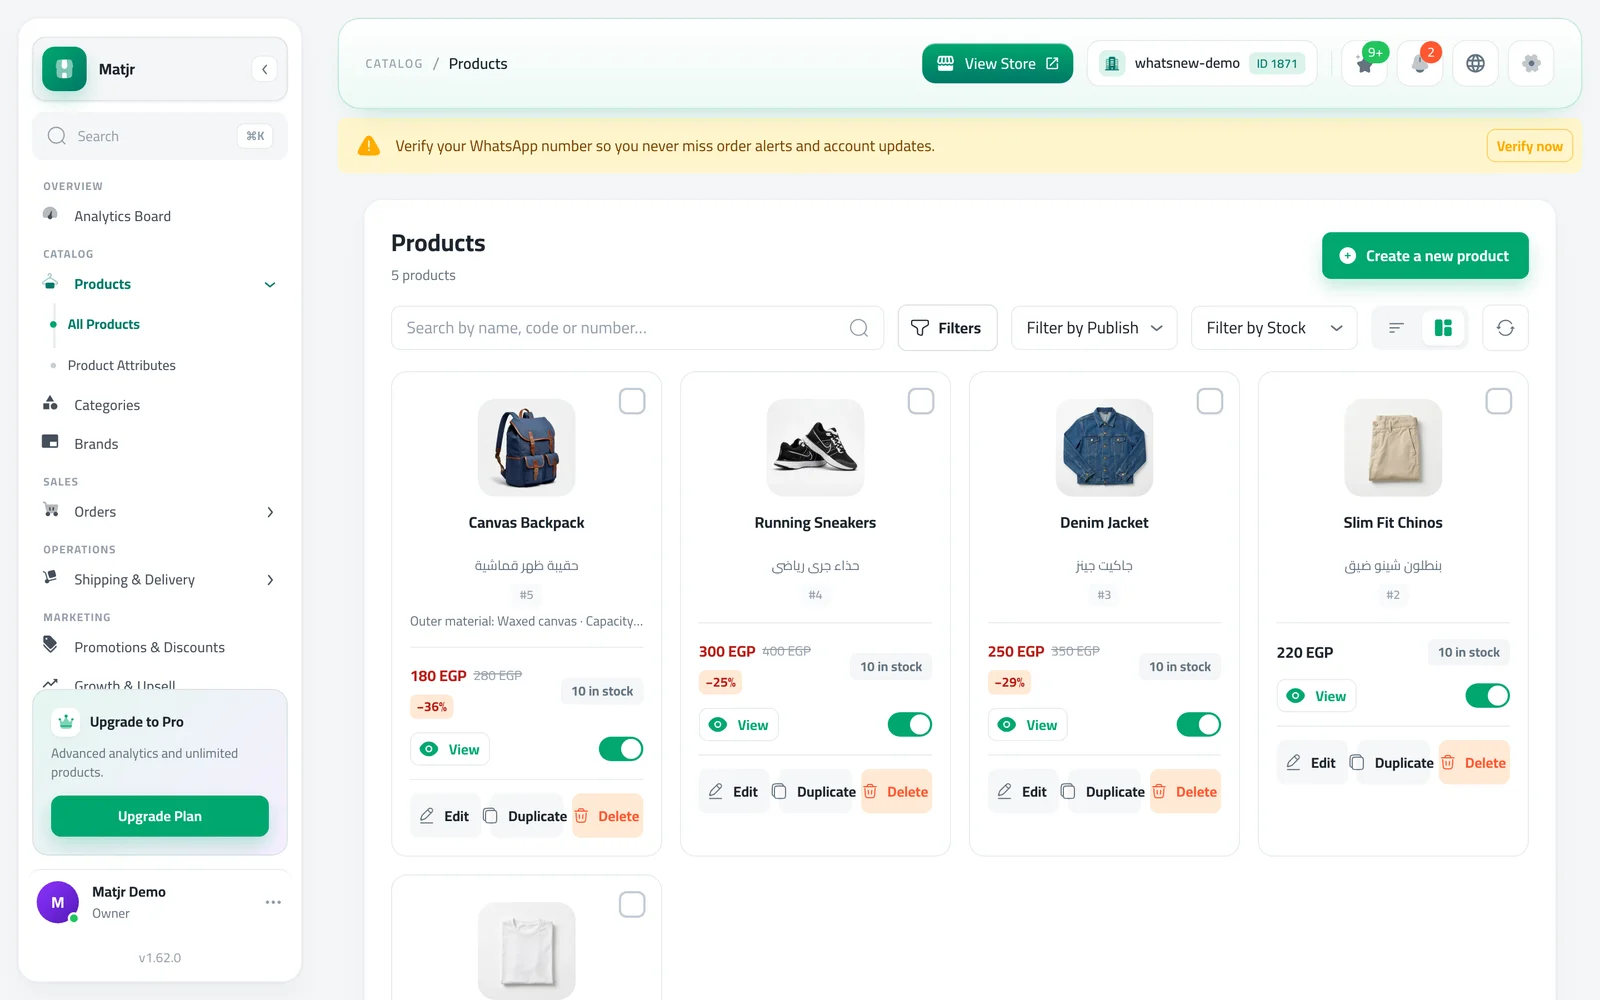
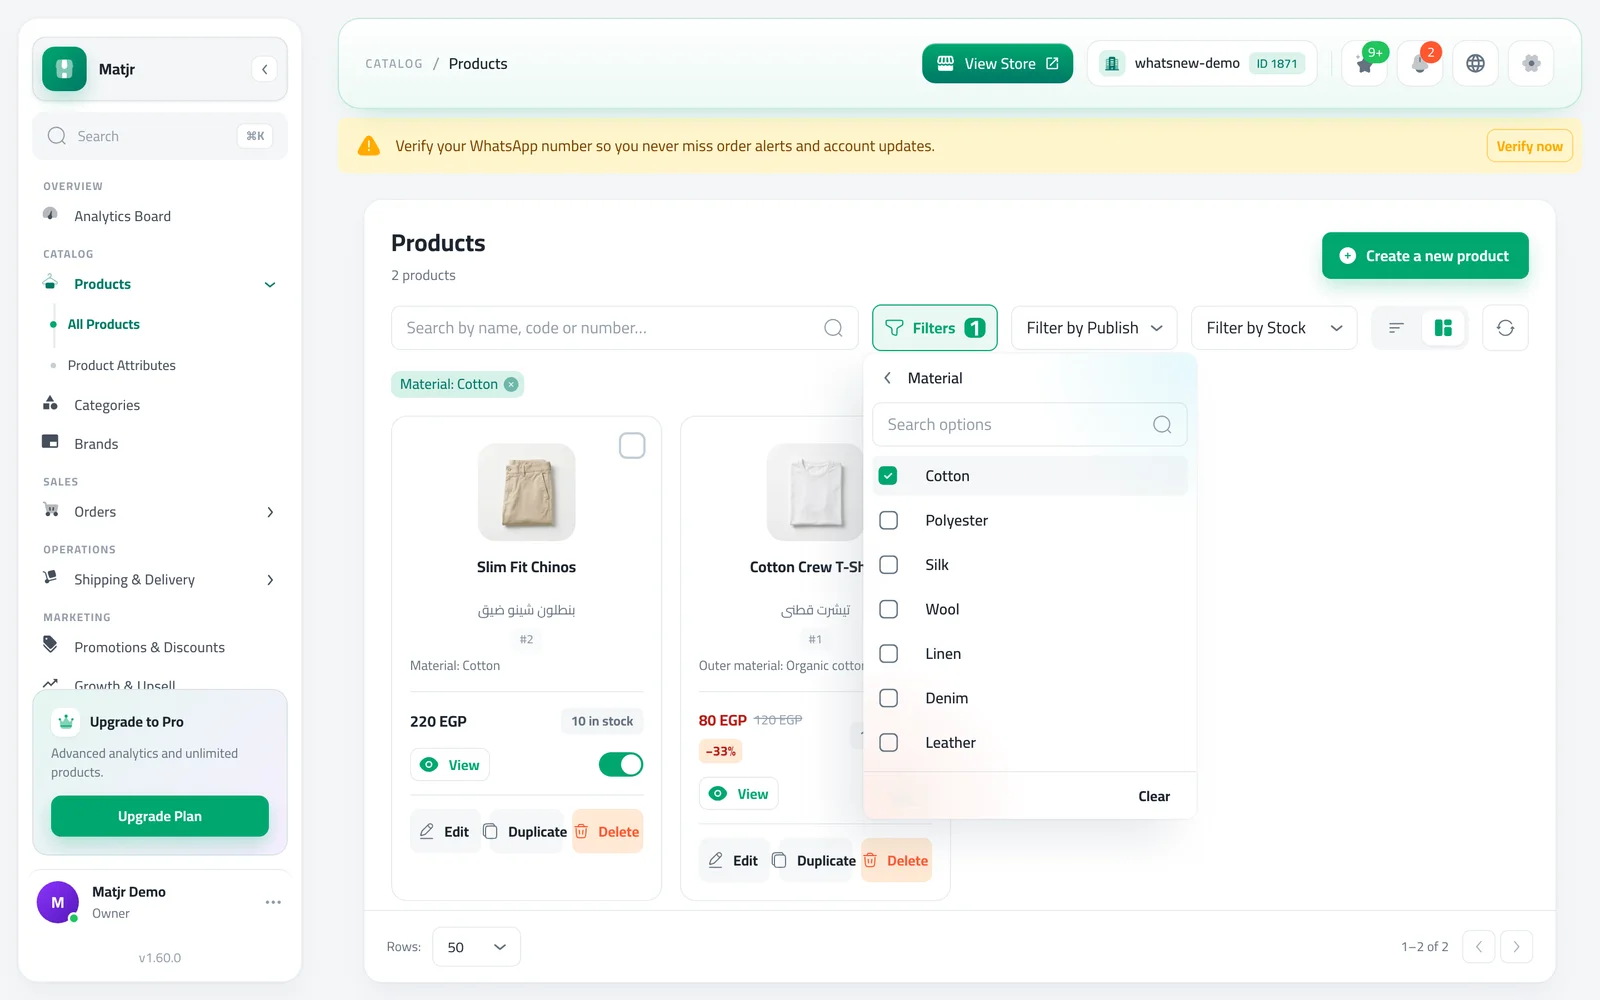
Open Products from the menu and click Create a new product. Every product in the list has Edit, Duplicate and Delete buttons, so you can also copy a similar product instead of starting from zero.
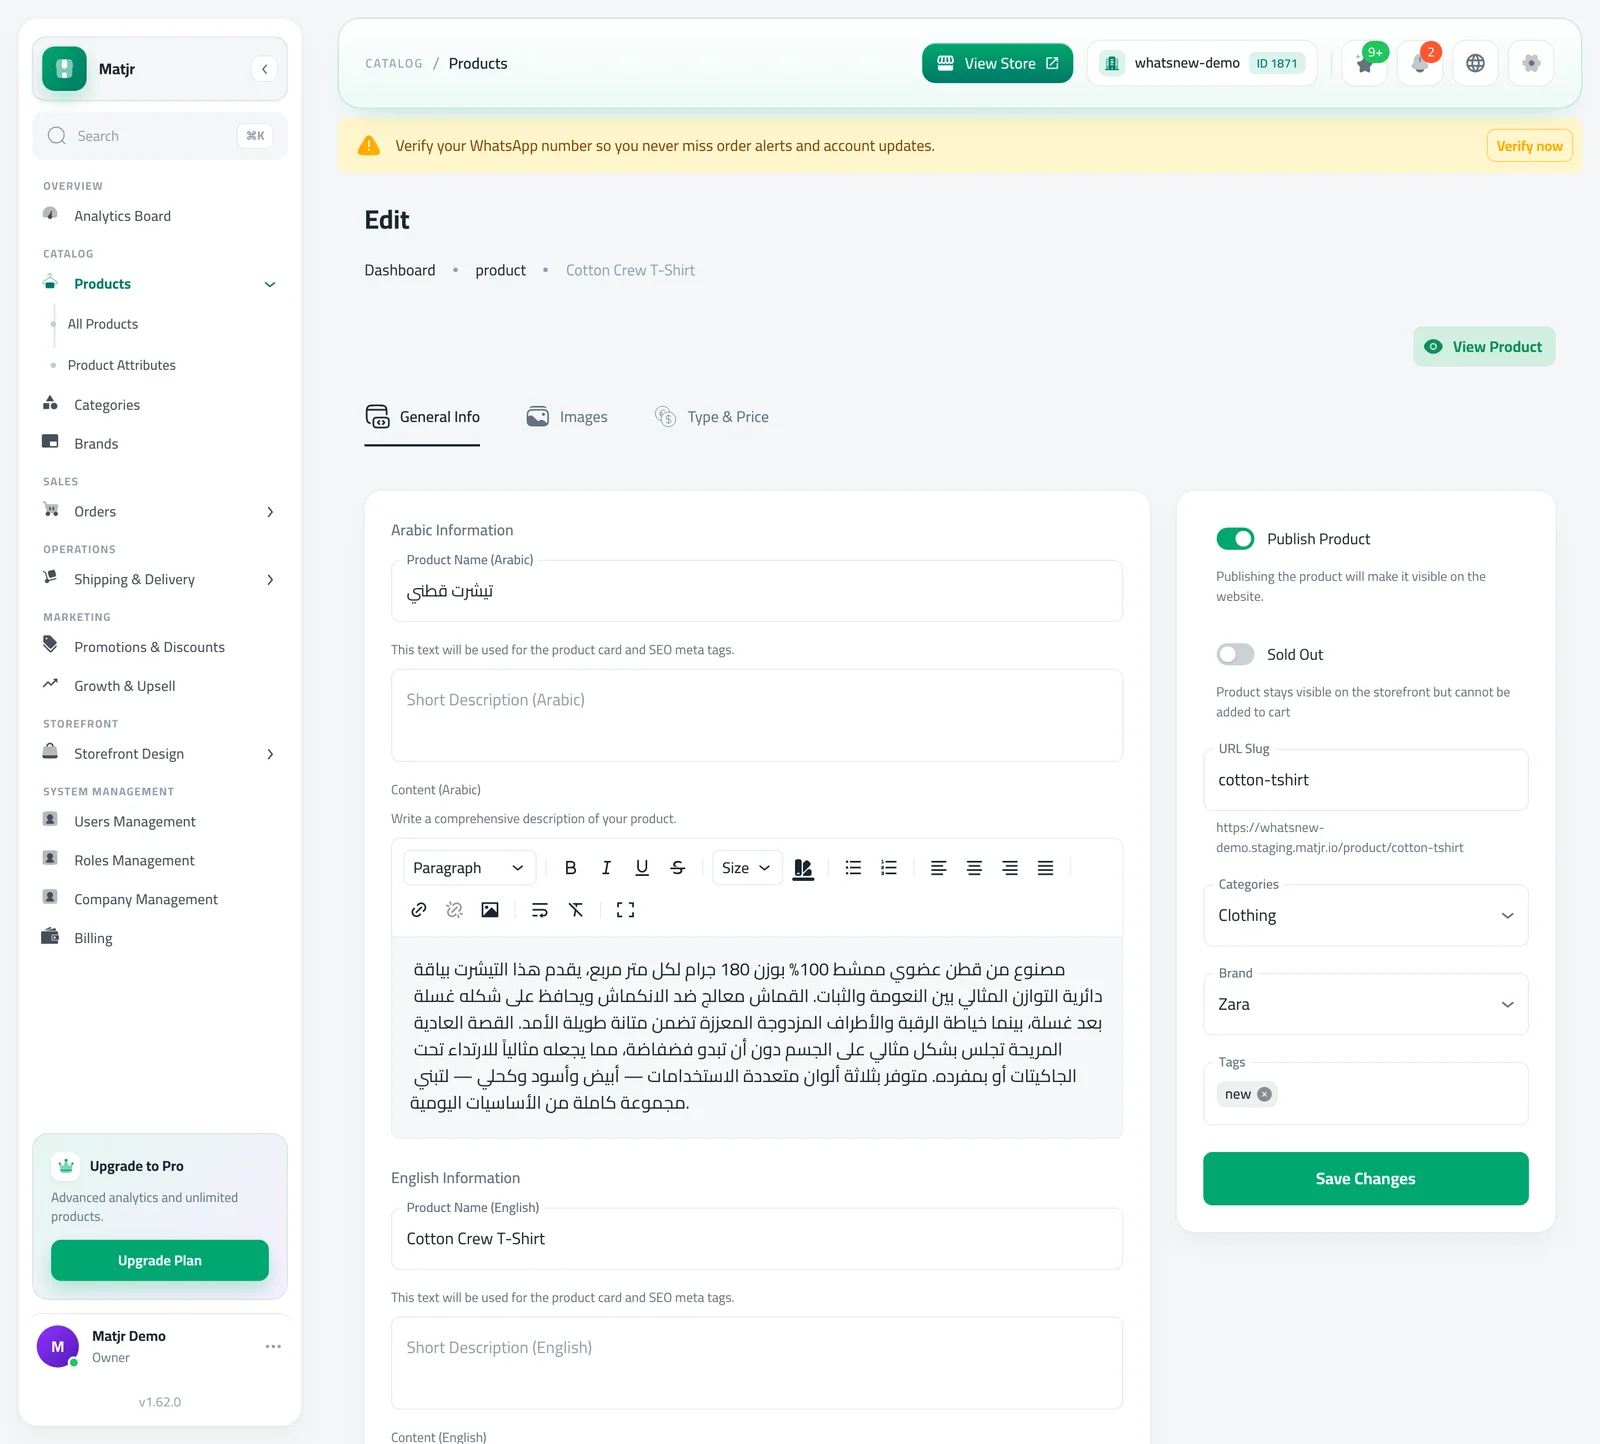
Write the name and the descriptions. Fill Product Name in each language your store uses. The Short Description appears on the product card, and the content box below it is the full description. On the right, choose the Categories and the Brand, and add Tags if you like. Leave Publish Product off for now and click Create Product at the bottom of the page. The product opens with three tabs so you can add the rest.
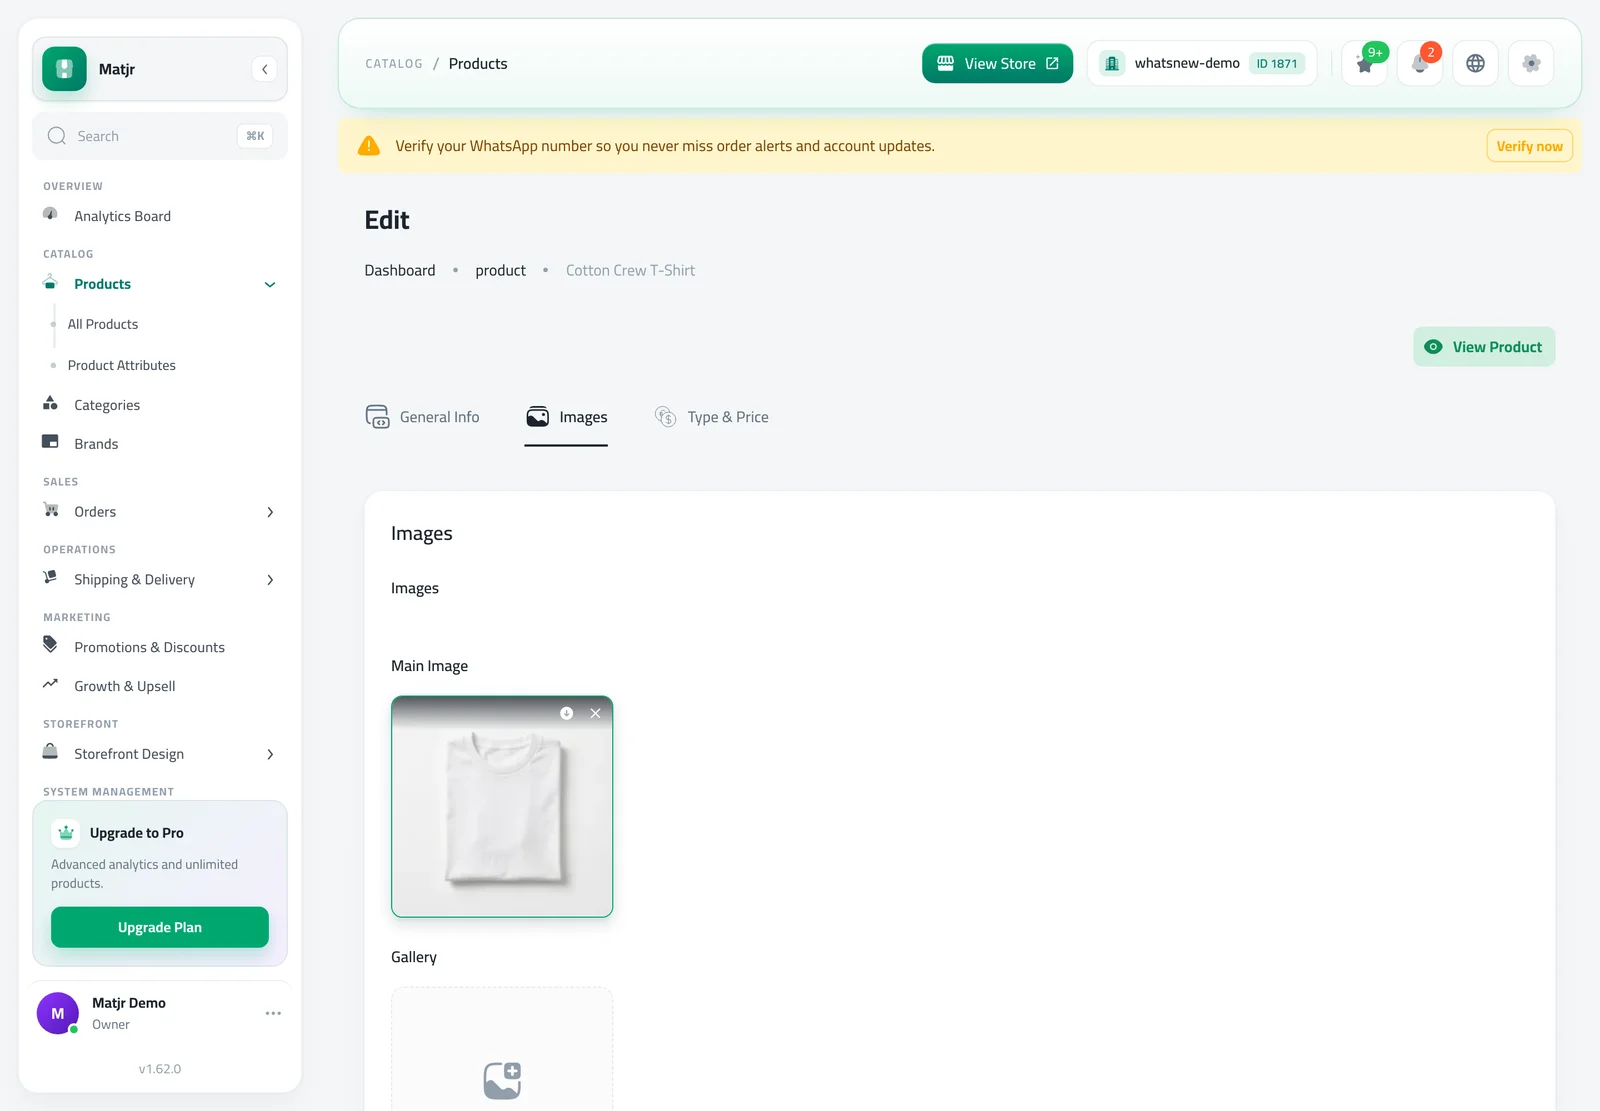
Open the Images tab and drop your photos in. The first photo is the Main Image shoppers see on the product card, and the others go to the Gallery. Drag the photos to reorder them, or choose another photo as the main one. Click Save Changes.
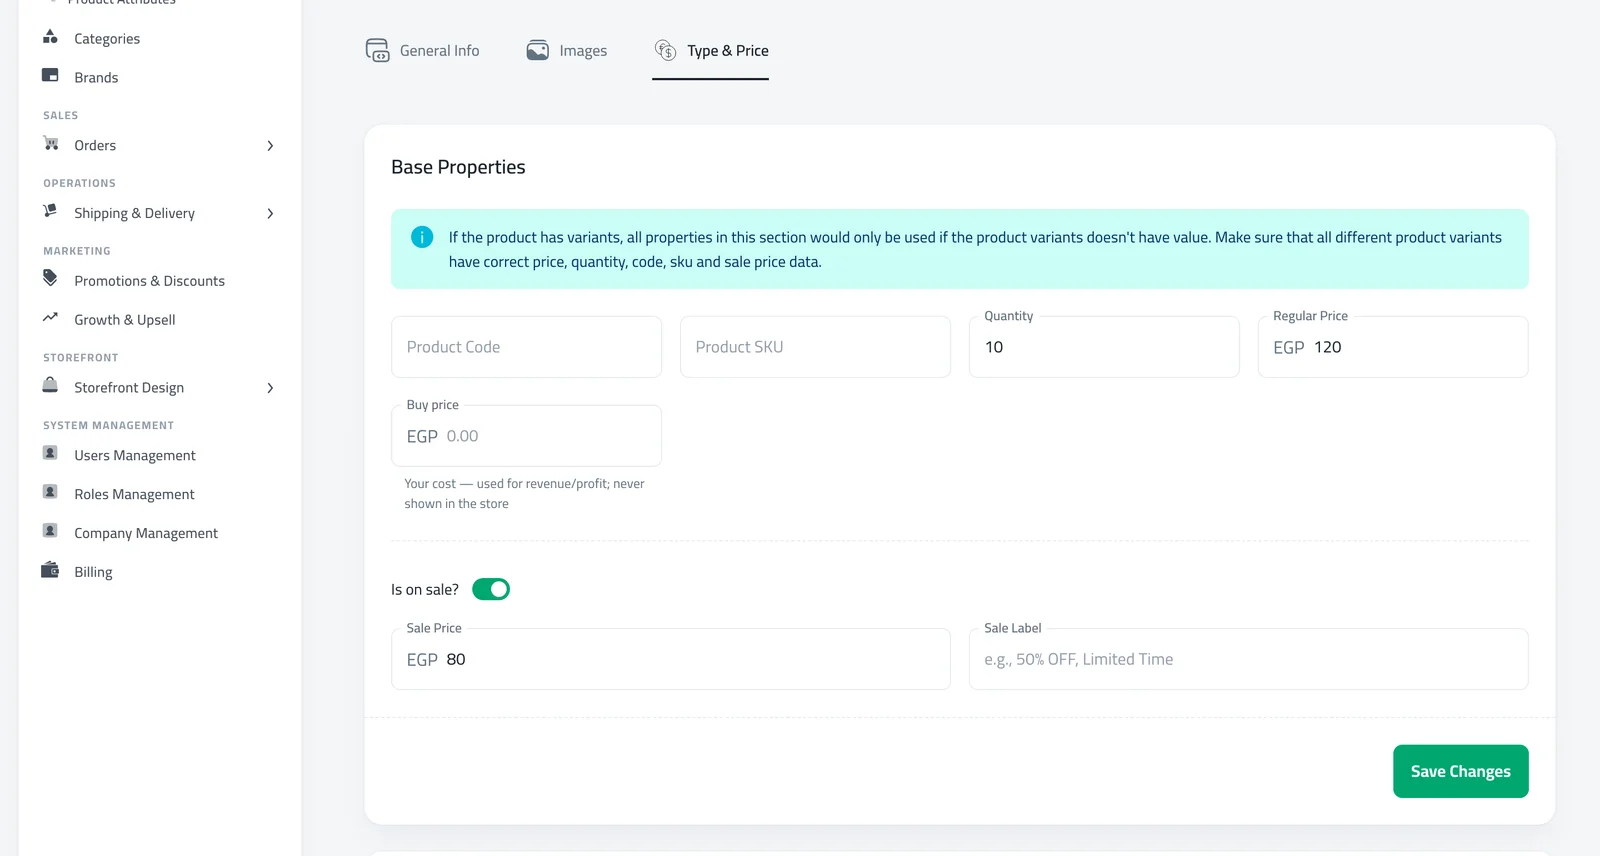
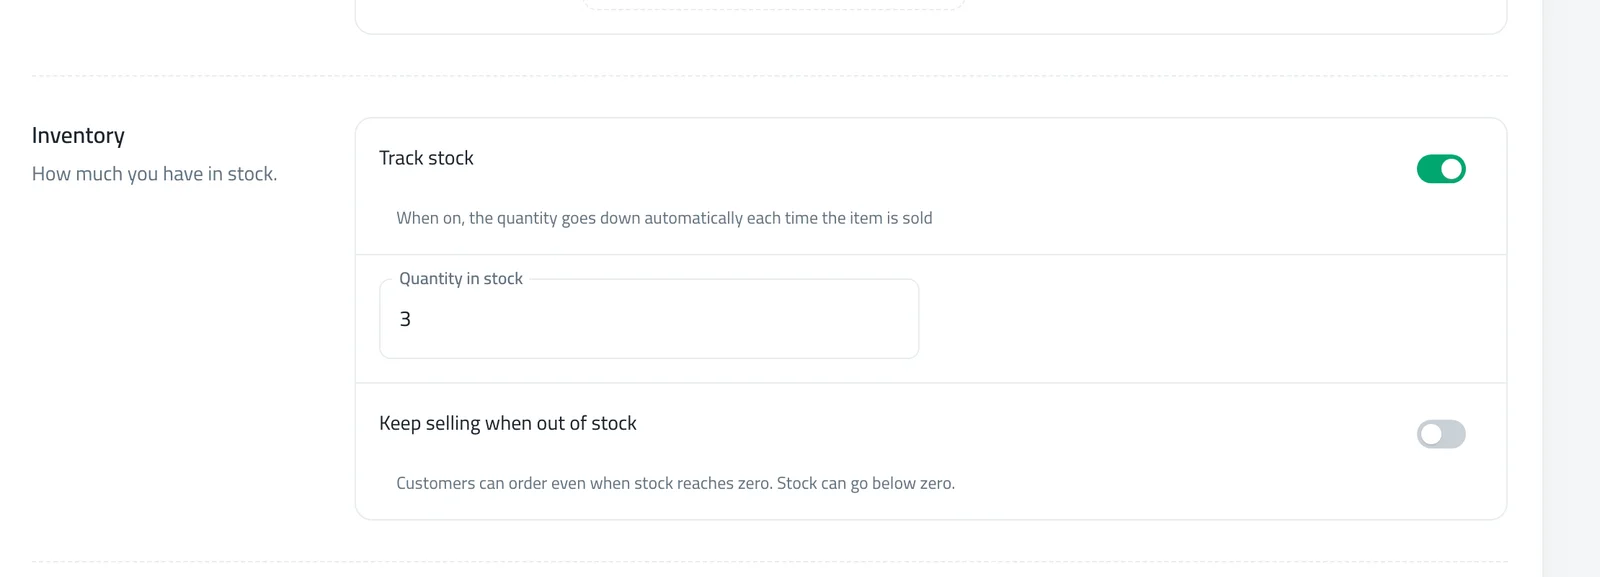
Open the Type & Price tab. Under Base Properties, enter the Regular Price and the Quantity. Product Code and Product SKU are optional, and Buy price is your own cost, which shoppers never see. To offer a discount, switch on Is on sale?, then enter the Sale Price and, if you want, a Sale Label such as "50% OFF". Click Save Changes.
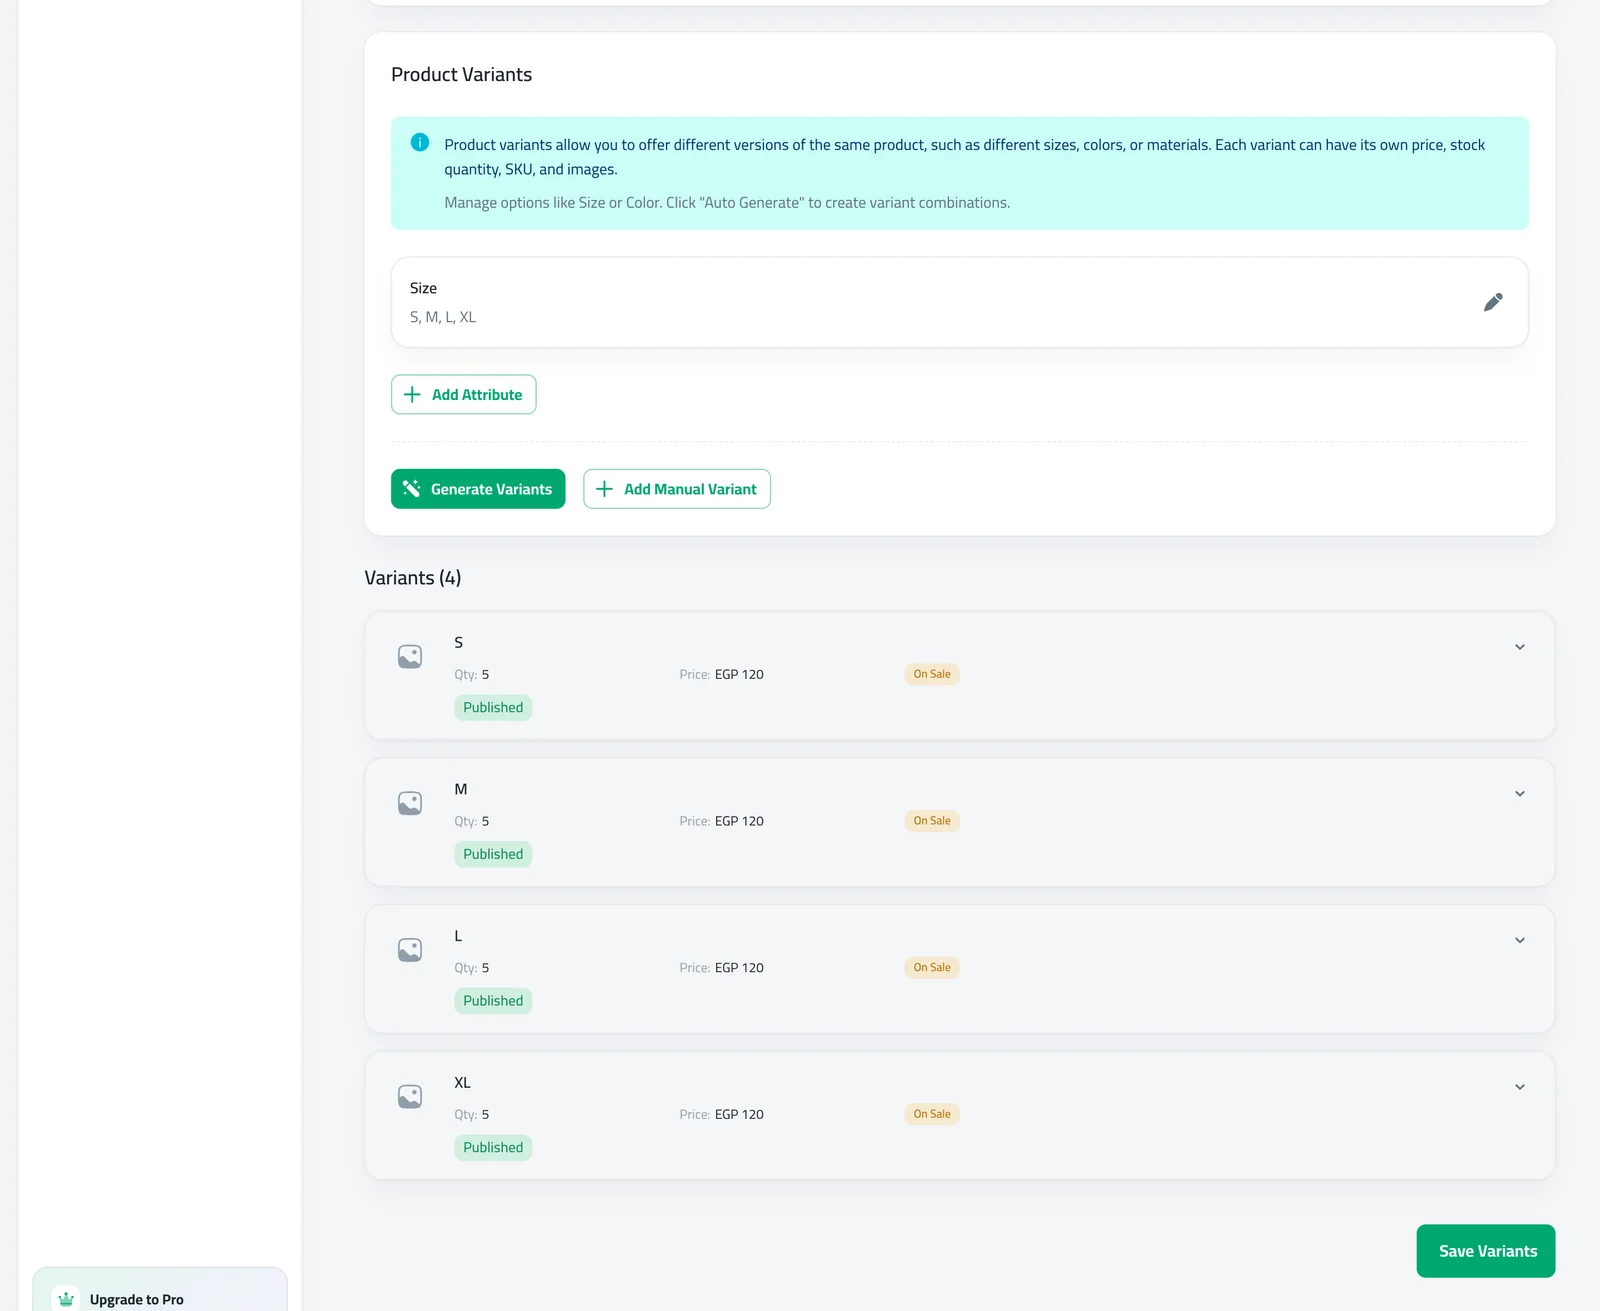
If the product comes in sizes or colours, scroll down to Product Variants. Click Add Attribute, choose Size or Color, type each option and click Add, then click Done. Then click Generate Variants and the dashboard creates one row for every combination. Open a row to set its own price, quantity and photo, then click Save Variants.
Go back to the General Info tab and switch on Publish Product, then click Save Changes. The product is now visible in your store, and the View Product button at the top opens it so you can check it as a shopper would.
Tips for products that sell
Write the name the way customers say it. "Black leather wallet" works better than a long code or a fancy name nobody searches for. Put the most important words first, because the name is cut off on small screens.
Take photos in daylight on a plain background, and show the product from the front, the back and one close-up. Customers cannot touch what they buy, so clear photos do the work of a shop assistant. Use the same style for all your products so the store looks like one brand.
Use the short description for the one thing that makes the product special, and the full description for sizes, materials and care instructions. Keep the price honest: if you use a sale price, the Regular Price stays visible next to it so shoppers see the saving.
After you publish
Open your store on your phone and find the product the way a customer would. Check that the photo is sharp, the price is right and every size or colour can be chosen. If something is wrong, go back to the product, fix it and save. Changes appear in your store after you save, so you never have to start again.
Common mistakes
- Forgetting to save. Each tab has its own Save Changes button, so save before you move to the next tab.
- Publishing before the price is set. A published product is visible to everyone, so finish the price and photos first.
- Leaving a variant without a price or quantity. The Base Properties values are used only when a variant has none of its own, so check every row.
- Using one photo style for some products and another for the rest. Photos on a plain background with the same size make your store look tidy.
Good to know
- Switch off Publish Product to hide a product at any time. Switch on Sold Out instead if you want it to stay visible but not be added to the cart.
- If your store manages stock through invoices, the Quantity box is locked and shows "Stock is managed by invoices".
- If a button is greyed out with the message "Subscribe or charge wallet to unlock this feature.", your plan needs to be active first.
- To show details such as material or warranty without creating variants, read how to add product specifications.
- Group your products so shoppers can browse them: how to create and organise categories.
- Then choose how your products look in the store: how to design your products page.
Frequently asked questions
Do I have to publish the product right away?
No. A new product stays hidden until you switch on Publish Product, so you can finish the photos and prices first.
How do I add sizes and colours to a product?
Open the Type & Price tab, scroll to Product Variants, add an attribute such as Size, type each option, click Add and Done, then click Generate Variants. Each combination can have its own price and quantity.
How many photos can I add?
You can add several photos to one product, each up to 15 MB. The first is the main image and the rest go to the gallery.
Why can I not change the quantity?
If your store manages stock through invoices, the quantity is locked and updates when you record an invoice.
How do I hide a product for a while?
Switch off Publish Product on the General Info tab and save. Use Sold Out if you want the product to stay visible but not be added to the cart.
Try it on your own store
Start your free trial. No credit card required.